Open Flux now, switch Copilot to “Next-gen” and see how it handles your next design challenge. The sooner you try it, the more your feedback can shape the next leap in AI-powered hardware design.
Buck and Boost converters are highlighted for their power efficiency and system reliability roles. The blog reveals their unique advantages, making them essential in diverse applications like renewable energy and portable electronics.

A Buck converter serves as a step-down DC-DC converter, adept at transforming a higher input voltage to a lower, regulated output voltage (Vout). The core components include an inductor, a diode, a switch (commonly a MOSFET), and a capacitor. By modulating the pulse-width modulation (PWM) duty cycle of the MOSFET, the Buck converter fine-tunes the Vout.

In contrast to the Buck converter, a Boost converter acts as a step-up DC-DC converter. It elevates a lower input voltage to a higher Vout. The essential components—inductor, diode, MOSFET, and capacitor—are arranged differently to achieve this function.
For systems that require both step-up and step-down voltage regulation, Buck-Boost and Sepic (Single-Ended Primary Inductor Converter) converters offer a flexible solution. They can function as either a Buck or a Boost converter, depending on the input voltage and system demands.
Flyback converters are useful for applications requiring isolated outputs, while inverting converters can invert the polarity of the output voltage, expanding the range of potential applications.
Buck and Boost converters, as specialized DC-DC converters, have become irreplaceable in the realm of modern electronics. Using simple components and concepts, like inductors, capacitors, MOSFETs, and PWM control, Buck and Boost converters work miracles for power circuits. Their unique advantages in terms of efficiency, versatility, and compactness make them indispensable in shaping the future of power management solutions.
In this blog, you'll get an insider's look at PCB manufacturing, learn how PCB boards have evolved, and why they're vital in almost every piece of tech you use. We cover all the bases from circuit board printing for basic gadgets to the advanced techniques used by top PCB manufacturers for multilayer boards. The blog also sheds light on upcoming tech that could redefine the industry. It's essential reading for anyone interested in electronics or PCBs.
The industry of PCB manufacturing has undergone significant transformations since its early days in the 20th century. Initially confined to single-sided circuit boards, technological advancements have enabled the development of more intricate double-sided and multilayer PCBs.
In today's technology-driven world, the importance of PCB manufacturing is monumental. These boards are essential for the functionality and reliability of a wide array of electronic systems, making their fabrication a cornerstone of industrial processes.
Single-sided PCBs feature only one layer of conductive material, typically copper, and are ideal for low-density designs. These types of circuit boards are prevalent in simple electronic devices like radios and sensors.
The fabrication involves applying a copper layer on one side of an insulating substrate. The unwanted copper is then etched away, leaving the desired circuit pattern. Soldering components onto the board follows this.
Double-sided PCBs have copper layers on both sides of the substrate, allowing for more complex circuits. These are commonly found in sophisticated devices like smartphones and automotive control systems.
The process includes applying copper layers on both sides of the substrate and connecting the layers using vias. Soldermask is then applied, followed by the HASL (Hot Air Solder Leveling) or ENIG (Electroless Nickel Immersion Gold) finishing process.
Multilayer PCBs consist of multiple conductive layers, separated by insulating material, and are used in highly complex systems like medical equipment and data servers.
The fabrication, or stackup, involves layering multiple sheets of copper and insulating material, which are then pressed together under heat and pressure. Circuit patterns are etched onto each layer, and vias are used to connect them.
The initial stage involves creating a detailed design of the circuit using CAD software, often incorporating DFM principles to ensure efficient manufacturing.
The substrate, usually made from materials like FR4 or Polyimide, is fabricated to provide mechanical support to the circuit board. This is followed by the stackup process, where multiple layers are combined.
Copper layers are applied to the substrate, and the circuit pattern is etched using chemical processes. The board then undergoes various finishing processes like applying soldermask and silkscreen, followed by HASL or ENIG surface finishing.
Emerging technologies like 3D printing and AI-driven optimization are set to redefine the PCB manufacturing sector.
The industry is increasingly focusing on sustainable materials and eco-friendly fabrication processes to mitigate environmental impact.
The demand for smaller, more efficient PCB boards presents both challenges, such as material limitations, and opportunities for innovation and technological breakthroughs.
Understanding the intricacies of PCB manufacturing, from the types of PCBs to the key stages in their fabrication, is crucial for anyone involved in the electronics or electrical engineering sectors. As technology continues to evolve, the PCB manufacturing industry is set for transformative developments that will significantly influence the future of electronics.
This comprehensive guide explores the roles and types of electrical connectors in any wiring project. From crimping tools to wire strippers, it outlines the tools and techniques needed for efficient electrical wiring. The post also provides safety tips and insights into specialized connectors.
Wire connectors come in various types, such as wire nuts, Wago connectors, and crimp connectors. Wire nuts are simple but effective, sometimes used to splice together small AWG (American Wire Gauge) wires. The twist and insulating properties of wire nuts make them popular in residential wiring projects.
Crimping involves placing a metal conductor inside a crimp and using a crimping tool to deform the crimp, enclosing and pressing together the conductor securely. Crimped connections are durable and reliable when done correctly. Crimping is often used for electrical wire splicing and terminal applications.
In solder connectors, the conductor is soldered to ensure a robust electrical connection. While soldering requires a soldering iron and solder, the resulting connection is extremely stable and strong. These are common in PCB (Printed Circuit Board) and other high-stake electrical wiring.
Wago connectors provide a lever-action to clamp down on the wire. They are often used for stranded wire and offer a reusable solution. DC connectors are used in low-voltage applications and are color-coded for positive (RED) terminal and negative (BLACK) terminal to prevent mistakes.
Insulation is another crucial factor. The insulation around the wire should be stripped using a wire stripper to expose the conductor before using any connector. Insulated connectors provide an extra layer of safety.
The gauge wire chosen should match the requirements of the circuit and the connector. Using a wire gauge that's inappropriate can lead to overheating or inefficiency. Can sometimes lead to intermittent connection.
The American Wire Gauge (AWG) is a standard system used primarily in the United States to denote the diameter of electrically conducting wire. The current capacity of a wire varies depending on several factors, such as the insulation type, ambient temperature, and whether the wire is in free air or bundled with other wires.
This table provides a rough estimate of the current-carrying capacity of copper wires with different AWG sizes, typically used for chassis wiring.
Copper is the most common conductor material. The quality of the conductor affects the reliability of the electrical connector.
Always consider the voltage and the circuit breaker involved. Incorrectly matched connectors and circuit breakers can result in electrical fires or other hazardous conditions.
For data transmission, ethernet connectors are usually used. Junction boxes serve as receptacles for multiple wire connections. For automotive applications, DTL (Deutsch Terminal Lugs) connectors offer robustness against harsh conditions.
Electrical connectors serve as the backbone for any electrical wiring project. Whether you are splicing, crimping, or soldering, understanding the roles of each connector can make your project efficient and safe. From the humble wire nut to the complex ethernet connector, your choice of connector makes all the difference in ensuring a smooth flow of electricity through your circuit.
So, the next time you take on an electrical project, keep this guide handy to navigate through the complex yet fascinating world of electrical connectors.
Happy Wiring!
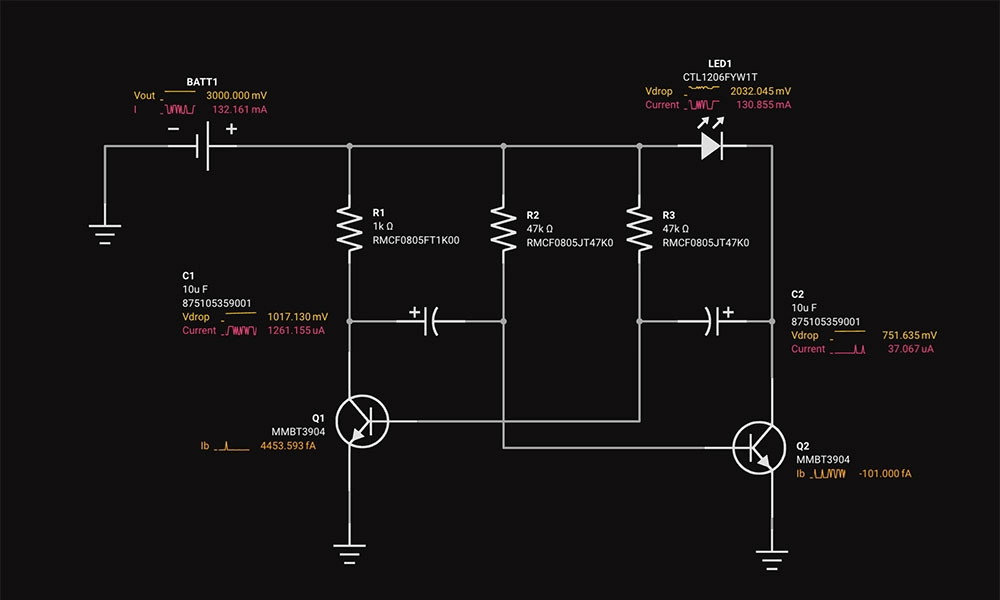
Circuit simulation is a crucial tool in electronic design. It uses software to predict how circuits will perform, saving time and money. Popular options like Flux, LTSpice, and CircuitMaker offer powerful features.
The importance of circuit simulation cannot be overstated. It assists in the detection of potential design flaws, reduces the need for physical prototyping, and accelerates the development cycle. In 2023, current trends in circuit simulation include the integration of machine learning for predictive modeling, the move toward online simulators, and the adoption of more accurate modeling techniques.
Circuit simulators are typically categorized into analog and digital types. Analog simulators, like SPICE (Simulation Program with Integrated Circuit Emphasis), model continuous signals, while digital simulators model circuits that have a number of discrete states. Some circuit simulators, like Flux's circuit simulator, operate directly in your EDA's schematic diagram. With an understanding of your netlist and schematic diagram, these simulators help verify the functionality of your system.
Circuit simulation can either be performed offline with software installed on a local machine, or online via web-based tools. Online simulators offer several benefits, including accessibility from any device, collaborative features, and easy updates. However, they might be limited in computational power compared to offline options and can be affected by network issues.
Numerous circuit simulators have gained popularity due to their robust features and user-friendly interfaces. Some of these include:
The feature set of circuit simulation software can be broad, catering to a wide range of needs:
Circuit simulation has many advantages. It offers cost-effective circuit design by reducing the need for expensive prototypes. It increases efficiency by streamlining the design process. It improves design accuracy by allowing for extensive testing and validation. It also simplifies troubleshooting by highlighting problem areas in the circuit.

Despite its advantages, overreliance on circuit simulation can have some drawbacks. It can lead to a lack of hands-on experience and a limited understanding of physical circuit components, both crucial for practical applications. It can be difficult to properly simulate the behavior of complex PCBS with dynamic parts like integrated circuit
Being able to simulate a circuit is a critical aspect of modern electronic design. The variety of available simulators cater to diverse needs, offering features ranging from circuit design to PCB prototyping. While the benefits of using circuit simulation are substantial, it's essential to balance its use with practical, hands-on experience. As we look toward the future, we can expect even more advanced and intuitive circuit simulation technologies, further revolutionizing the electronics design landscape.
Describes Flux.ai's process of enabling 'noUncheckedIndexedAccess' in their TypeScript codebase. This setting enhances type safety by enforcing checks for possible 'undefined' values but introduces numerous type errors in a large codebase. To manage this, Flux.ai used heuristics and automation to suppress new errors with '!' and automate fixes using a provided script.
Flux.ai was started around 3 years ago in TypeScript with the default compiler settings. If we could go back in time, there is one setting we would surely change: noUncheckedIndexedAccess. By default, this setting is false. Many people believe it should be true.
What does noUncheckedIndexedAccess do? By default, TypeScript assumes any array element or object property you access dynamically actually exists:
In the example above, the function will throw an error if the string is empty, because str[0] returns undefined and doesn't have a toUpperCase function. TypeScript doesn't warn you about that, regardless of whether strict mode is enabled or not. This is a huge hole in type safety.
The flag noUncheckedIndexedAccess will plug that hole and force you to deal with the possible undefined:
So, why can't we just turn on noUncheckedIndexedAccess? You can, but in a large codebase like that of Flux.ai, you are likely to get thousands of type errors. We had 2761 errors across 373 files! For one speedy engineer converting one file every minute, it would have taken 6+ hours of mind-numbing work to convert all 373 files.
The solution we describe here is how to smoothly convert your codebase with some simple heuristics and automation.
According to Wikipedia, a heuristic technique
is any approach to problem solving or self-discovery that employs a practical method that is not guaranteed to be optimal, perfect, or rational, but is nevertheless sufficient for reaching an immediate, short-term goal or approximation.
That is definitely true here.
The goal was to get the codebase compiling with the new flag, not to fix any bugs. The fixing can come later.
To that end, we intentionally added type assertions ! to suppress all new type errors from undefined types without changing the runtime behavior of the code.
Expanding the scope of replacements to preceding lines allowed us then to automate more fixes with few false positives.
The full script we ran on our codebase is below. Note: it did not fix all the errors. It fixed around 2400 out of 2761 errors, leaving around 100 files for us to fix by hand.
Pro-tip: when experimenting with the replacers and precede, you can simply reset your changes with git reset --hard HEAD (assuming you are working in a git repo).
In this blog post, we explore how Flux.ai effectively uses Web Workers and ImmerJS to enhance data replication in our web-based EDA tool. We discuss our challenges with data transfer, our exploration of SharedArrayBuffer, and our ultimate solution using ImmerJS patches.
Web Workers are an established browser technology for running Javascript tasks in a background thread. They're the gold standard for executing long-running, CPU-intensive tasks in the browser. At Flux.ai, we successfully harnessed Web Workers, paired with ImmerJS patches, to minimize data transfer and deliver an ultra-fast user experience. This post will take you through our journey of using Web Workers and ImmerJS for data replication in our web-based EDA tool.
Flux.ai, an innovative web-based EDA tool, needs to compute the layout of thousands of electronic components simultaneously for its unique PCB layouting system. This process must adhere to user-defined rules. Our initial prototype revealed that layouting could take several seconds, leading us to explore the capabilities of Web Workers to parallelize this process and unblock the UI.
At bottom, the web worker API is extremely simple. A single method, postMessage, sends data to a web woker, and the same postMessage method is used to send data back to the main thread. We use a popular abstraction layer on top of postMessage, Comlink, developed several years ago by Google, that makes it possible to call one of your functions in a web worker as if it existed in the main thread. Newer, better or similar abstractions may exist. We did learn in using Comlink that it can easily blow up your JavaScript bundle size.
The trouble with using a web worker in a pure RPC style is that you most likely have a lot of data to pass through postMessage which is as slow as JSON.stringify, as a rule of thumb. This was definitely true in our case. We calculated that it would take 100ms at our desired level of scale just to transfer the layouting data each way, eating into the benefit of a parallel web worker.
A potential solution to the data transfer problem could be using SharedArrayBuffer, recommended for use with web workers. However, SharedArrayBuffer "represents a generic raw binary data buffer" meaning that a) it is of fixed size and b) it does not accept JS objects, strings, or other typical application data. Our investigations led us to conclude that the performance benefits were offset by the encoding and decoding costs in SharedArrayBuffer. One hope for the future is a Stage 3 ECMAScript proposal for growable ArrayBuffers.
We decided instead to populate our web worker with all the data on initial load of a Flux document (while the user is already waiting) and update it with changes as they happened. An added benefit of this approach is that the functions designed to run inside the web worker can also be run in the main thread with the flip of a global variable. You might want to do this for Jest tests, for example, which do not support web workers by default.
We got our changes in document data from ImmerJS, something we were already using as part of Redux Toolkit. Immer is an extremely popular library that enables copy-on-write for built-in data types via a Proxy. A lesser-known feature of Immer is Patches. The function produceWithPatches will return a sequence of patches that represent the changes to the original input.
We made a function that wraps produceWithPatches and assigns the patches back into the document for use downstream.
With the patches in hand, we could then complete our data flow from main thread to web worker and back again. The main thread calls the worker functions from middleware after every global state change. In Flux, we use redux-observable middleware.

In the code, the relevant functions look like this, assuming you are using Comlink.
The result of our use of Web Workers and ImmerJS patches was a significant reduction in workload on every document change and the ability for users to continue interacting with the application during a large re-layout - a priceless benefit in our web-based EDA tool.
For extra speed in our web worker, we forked the Immer applyPatches function. The original version was too slow for our needs. So, we adapted applyPatches to skip the draft step and mutate the target object in-place, resulting in a 10X speedup.
In conclusion, Web Workers and ImmerJS have proven to be powerful tools for efficient data replication in Javascript, particularly in the context of our web-based EDA tool, Flux.ai. They offer a potent combination for handling complex, CPU-intensive tasks, and improving user experience through faster data transfer and processing.